2020 started with people having plenty of free time home and that’s the beauty of this period when people would be having ideas of a very innovative thing called “Startups”. This post is no such plan of mine. 10 minutes reading and probably 30 minutes of practically applying this method will just help you create your website/ personal blog on Google Cloud for Free for a year.
OBJECTIVE: The objective of this blog post is to demonstrate a step by step procedure to host your website/ personal blog on Google Cloud Platform for free for a year. The procedure is the same if you want to pay for the services 🙂
Introduction: Let’s start with making clear understandings and objectives.
- This is not a post to learn web development. That’s an altogether another topic. However, I’ll tell you how to make a WordPress blog with just a click at the end of this post.
- I will be covering Apache PHP Based websites. Reason to choose PHP is it is the best to create content websites. According to research, There are 80% websites on the Internet which are developed using PHP.
Requirements: Let’s start with the below pre-requisites beforehand we start implementing this in real.
- Free GCP Account — https://cloud.google.com/free — Google offers $300 free credits for new users on Google Cloud Platform.
- A domain name — You can purchase your domain name from various vendors on the internet few of my favourites are name.com namecheap.com
- Free Cloudflare Account. We will use Cloudflare to manage DNS and website catch — You can skip this part but believe me it’s worth a task.
- Free Webhosting panel — A Webhosting panel is a bundle of software which are required to manage a web server and run a website. We will use my personal favourite CentoOS Web panel
That’s it, folks — Let’s start with the process and create a fresh new server for you.
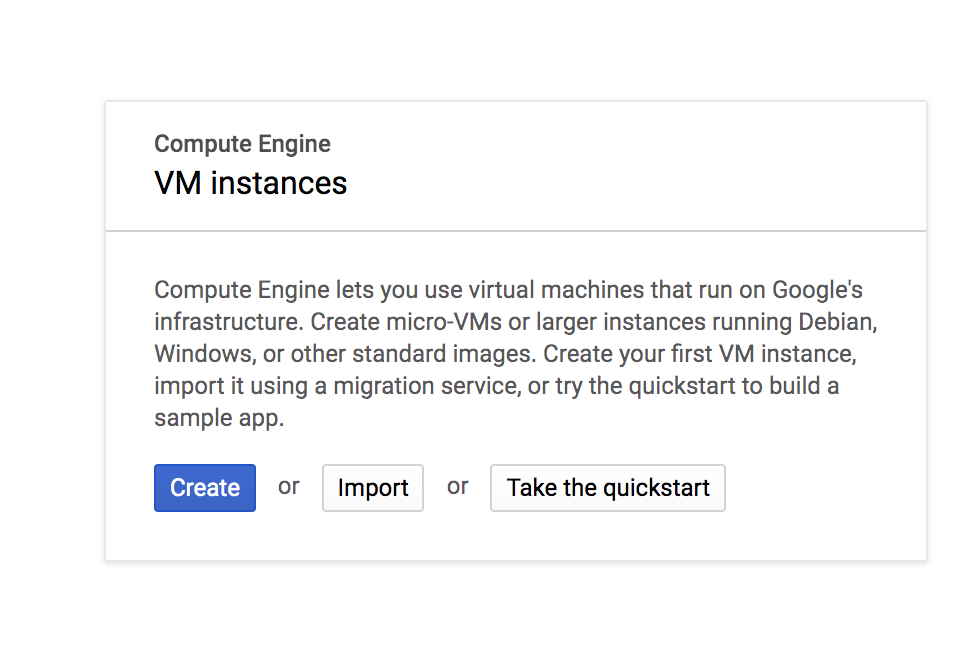
Creating a compute engine in GCP :
Step 1: Log in to your GCP account and head to Compute Engine Virtual Instances and click on create a new Compute Engine.
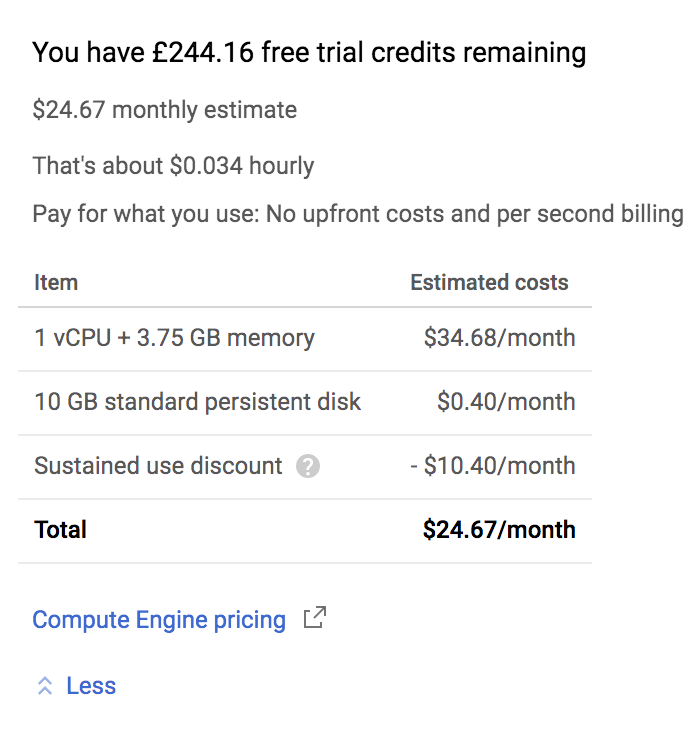
Step 2: Get the correct configuration for your Compute Engine :
The important thing to note here is Region/Zone and Machine configuration. Below configuration is the most optimal config you would require for a WebHost. The cost of n1-standard-1 in us-west1 would cost around $24 per month, that would be $288 for 12 months which is under $300 credits available for free to use by Google.

Step 3: Choose the Operating System
Google offers various operating systems. My favourite is centOS so let’s proceed with CentOS.

Step 4: That’s it — Your server is ready to go — Click finish and wait for the magic to happen. Once your server is ready you will be able to see something like this. To login to your server just click on SSH.

Once you have logged into your server — All you have to do is install a WebHost pannel. CentoOS Webpannel in our case.
Installing CentOS Web Panel
Step 1 — Login to the GCP Compute engine just created.
Step 2 — Login with root with the command:
[tushar_kesarwani09@instance-1 ~]$ sudo -s
Step 3 — Follow the instructions on the CentOS Website — http://centos-webpanel.com/server-update
[tushar_kesarwani09@instance-1 ~]$ yum -y install wget
[tushar_kesarwani09@instance-1 ~]$ yum -y update
[tushar_kesarwani09@instance-1 ~]$ reboot
---- Wait for the SSH Shell to come back ---
[tushar_kesarwani09@instance-1 ~]$ cd /usr/local/src
[tushar_kesarwani09@instance-1 ~]$ wget http://centos-webpanel.com/cwp-el7-latest sh
[tushar_kesarwani09@instance-1 ~]$cwp-el7-latest
These commands will take some time. Always refer to the commands from official website as these could change.
That’s it folks — once above commands are executed properly you will have the login details for the admin portal for centOS Web Pannel. The final confirmation would look like the below message. Don’t forget to save the below details.

Step 4: As you can notice on the above Screenshot, password to login to the server panel is the SSH root Server. By default root user has no password, so we have to reset the password for root user using ssh shell.

That’s it folks — You have a running web panel to host your domain. Let’s log in and play around.
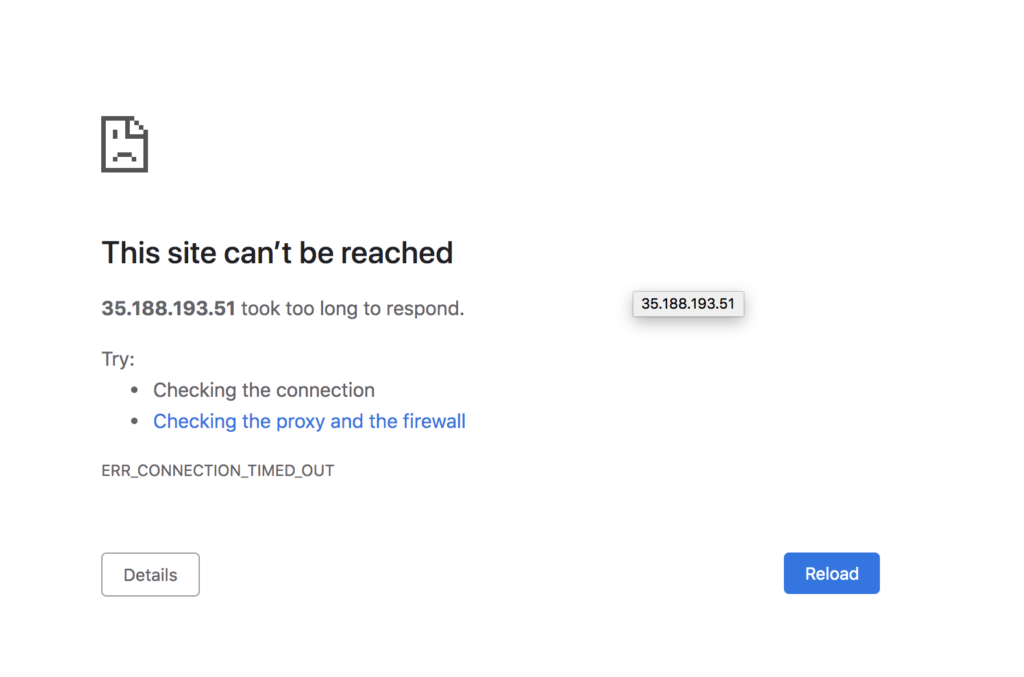
Admin panel still not working? Yes — Don’t worry if you are getting the below error. The reason is GCP does not open the ports automatically. You have to open the Ports from the firewall rules. Let’s learn how to do that 🙂
Creating Firewall Rules To Open Access To Required Ports:
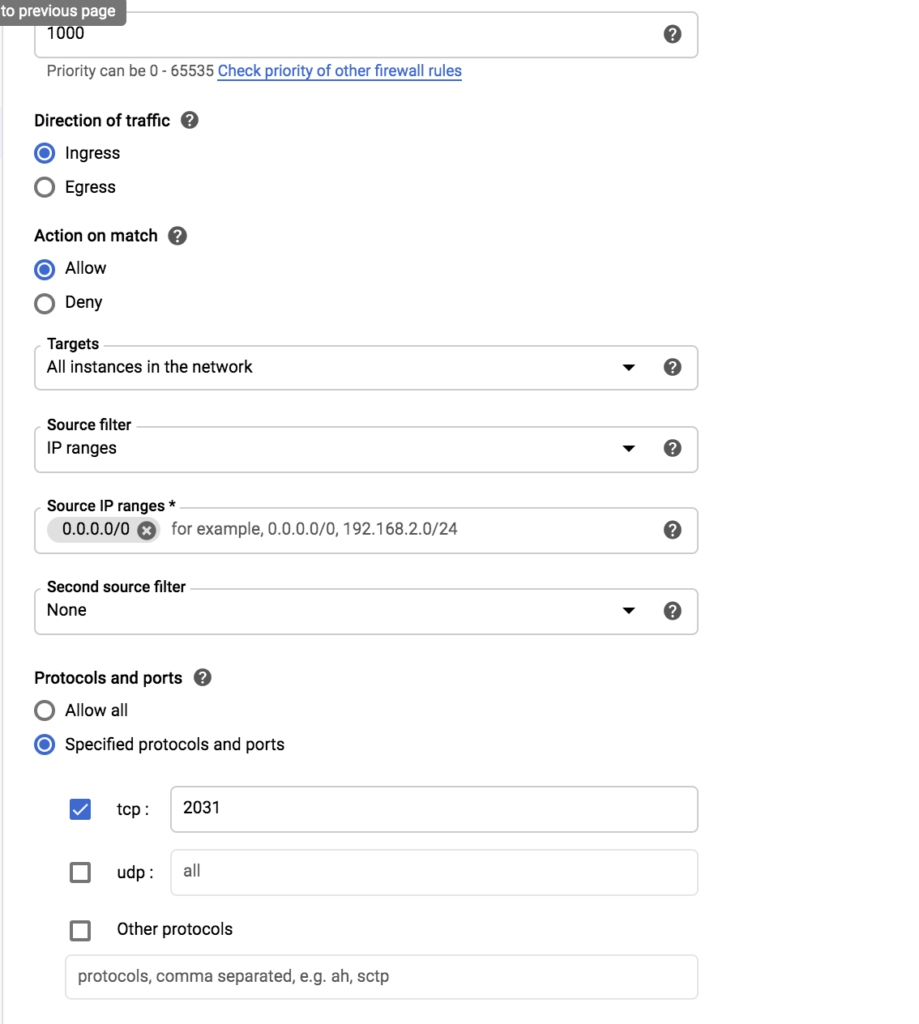
Step 1:- Login to the VPC Network section and click on Firewall Rules.

Step 2:- Create a new Firewall Rule to open access to port 2030 and 2031 with the below configuration.
Step 3:- Once you have created rules to open port 2030 and 2031 required for centOS web panel, you will be able to login to the centOS web panel.


Hit Like if you can see the below screen 🙂
Note: The password for the panel is the root password you reset on ssh few steps back.
Now comes the final step where we have to add a domain to this server and have our first website online 🙂
The final step is to point your domain to this server and add it in the web panel.
Adding the domain to the Server :
Step 1: Adding the domain to Cloudflare and create DNS Records pointing to your server. Adding your domain to Cloudflare is not a mystery, You just have click “Add a new site”. Choose Free package and finish.
Step 2: Next step is to add DNS records in Cloudflare. See the picture below to create similar records.

Step 3: Change Name Servers on your Domain manager to point it to Cloudflare so Cloudflare can redirect it to your server.

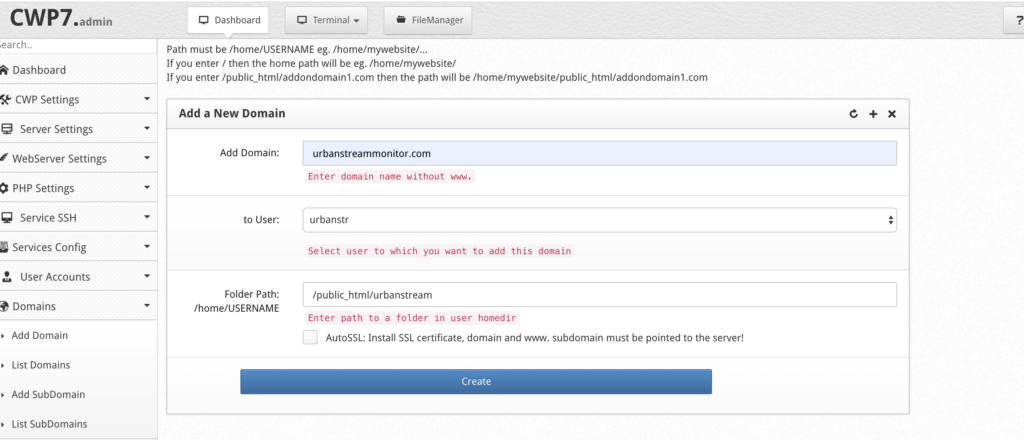
Step 4: Add Domain to your web panel
Now that’s the beauty of CentOS Web Panel, managing a domain is very easy. Just find an option to “Add Domain” and fill the details.
Step 5: You are Live 😀
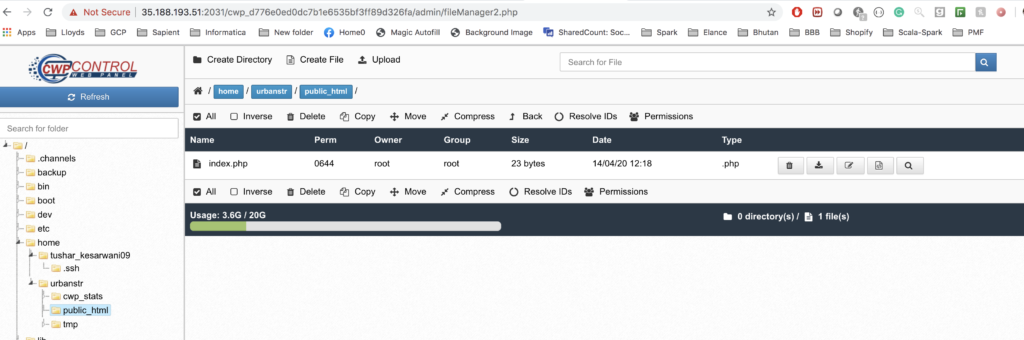
Let’s prove this by writing something on the website. Let’s upload a basic HTML page to see if my domain works. Changing website content is easy with centOS web pannel. Just look for File Manager and go to the folder you have you filled in the above form while adding the domain and put your own HTML Code.

Let’s open your website 🙂

BONUS :
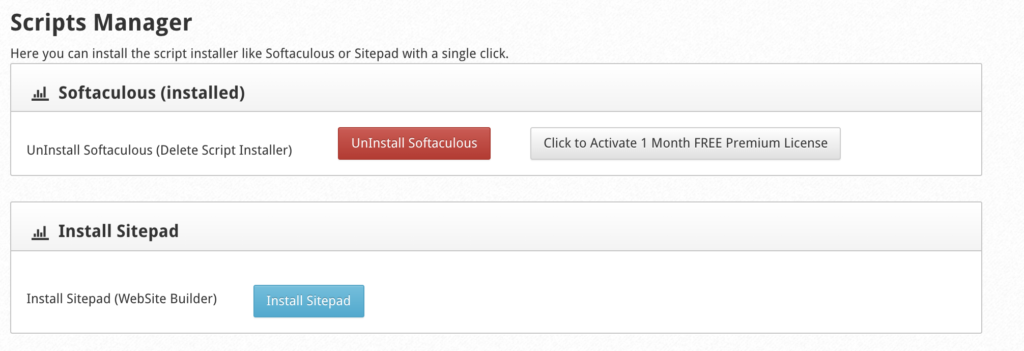
So I have put-up a detailed step by step guide to take you online. You can explore the web panel to explore various features like setting up an email service, installing blogs, CMS Softwares on your website. CMS Softwares like WordPress is very popular for running content websites like a personal blog. My personal blog asktushar.com is WordPress based. Look for Softaculous in the panel to install CMS software on your website. Follow the screenshot below
That’s it, folks. I hope it helps you with creating your first website online. If you have any queries don’t hesitate to leave a reply here or email me to contact@asktushar.com
.jpg)


